Greetings !
Today I share how I did my recent project . Yes it's a purse for myself and I love it . There are some of my favorite colours used in this one , I Really liked the fabric, a new pattern I drafted and I could pull it off !!! all in all I just love the way it has turned out.
Here goes the making of Purse.
First things first , any purse will have few main parts
Outer main body , lining , pockets , gusset , closure , flap ... ( pardon me if I miss anything )
This is my own pattern , I draw the shape I would like to make , and then add pockets . Decide the closure if it will be zip or snap or flap ... So design your own just draw what you would like in the purse.
I first make a rough sketch of the shape and the parts I would like on it . Then decide what finished size I want it , add seem allowances. It's time to draw it on newspaper ! Yes I use newspaper to finally draft my patterns .Incase I want to save t hem then transfer on more sturdy base.
Here I take that you know your basics , and hence have not given very detailed instructions . I have included lots of pics which will make it very clear . You will know how I approched this project.
let's start creating !!
This one has two sections , one has a zip closure And the other magnetic snap.
I have given one open pocket on the outside and one zipper pocket at the back .
Inside this one has open pocket and a zippered pocket.
Step 1
All pieces cut , Ironed , Interfaced .
4 in main Fabric
4 lining
Pockets
Flap
Interfacing for the sections .

Preparing the pockets .
The front open pocket with flap has pleats .can be done as per the wish without pleats as well.

Inside open pockets are ready with interfacing and are already turned out.
Preparing the front panel and Flap.
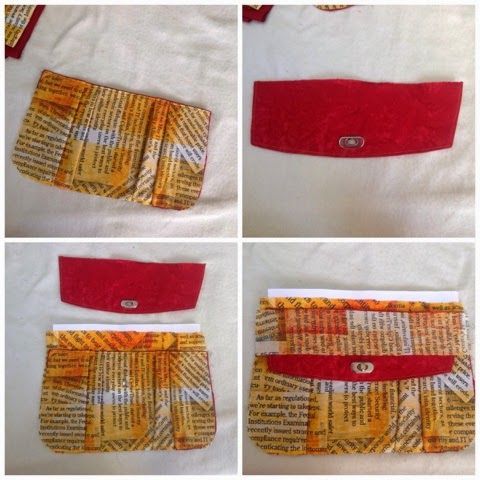
Stitch lining , then pleat the open pocket , Align the open pocket onto the interfaced front panel .Mark the position of hardware , and fix them on flap n pocket before basting , fix them and baste the pocket onto main panel.position the flap ,place top strip of main fabric on to the flap and stitch on the top of front panel.flip n iron ,This finishes our top panel .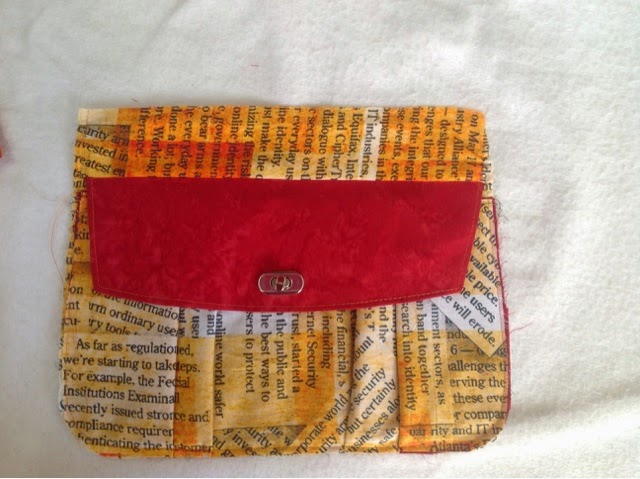
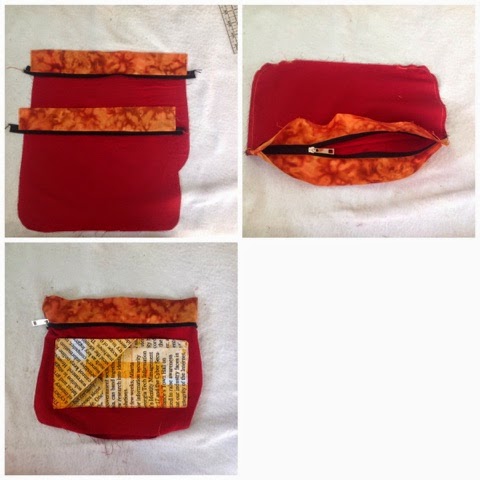
Prepare the back panel of bag with zipper.
I have done a welt pocket there..you can find many tutorials on that one .
Once we do that we will have our 4 outer pieces ready as you can see.
I wanted to try piping on a bag. Made black piping . Baste it following the edge of purse .
I basted it onto all 4 panel ...silly me :) it will go only on two of them ...so ripping time !
All set . 4 outer panels ready !!
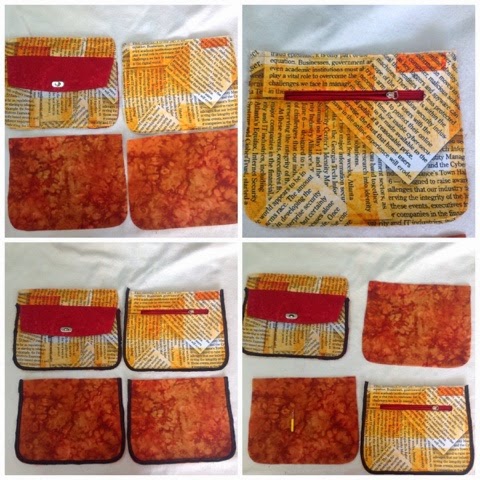
Putting together the purse


I have clicked the pics to explain this one .
Take the inner outer panel and draw a rectangle in the centre , stitch over it . Securing it well.
Fold one of the side like shown , pin one side of the main outer panel nicely n stitch . I try to stitch right on the basting line, we did for piping . Once done turn the purse right side out ...Try turning the bag with a straight face , ;) I bet you can't ...:-D
The other section .
In the similar way prepare the other section . Make sure you fold the ready bag properly so that it does not get caught in the seam.Turn right side out.
Preparing the lining
Added the black zipper onto the two sides . Fix the zipper tab and stitch..leaving a good gap at the bottom , we will close this one after putting it together with outer body of purse. Forgot to add the open pocket...never mind it was not very difficult to fix it...
Lining with open pocket n one zipper as well now . I have again installed a welt zip on one side .For this section I choose to have snap closure. Now is the time to fix the snap.Both section's lining all ready :) we are getting there.slow n steady.
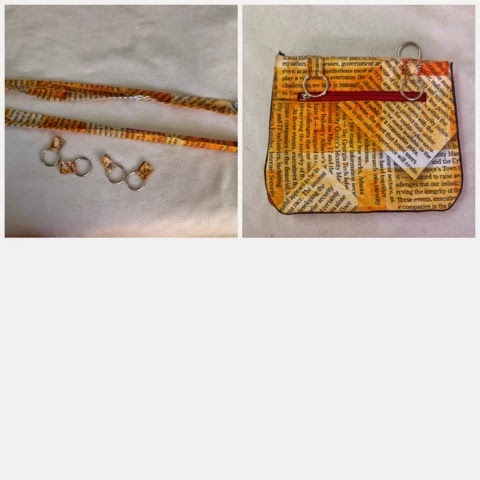
Handles and tabs .
Make handles the way you like them , I made flat handles , and used round rings for holding them. Wish the tabs were a little more neatly done .Fix the tabs onto front and back of purse .
Fixing the lining
I find this part the most difficult of all.
The purse is right sides up , I slide the lining onto the purse keeping right side together pin around the edge . And stitch , having an open arm machine helps .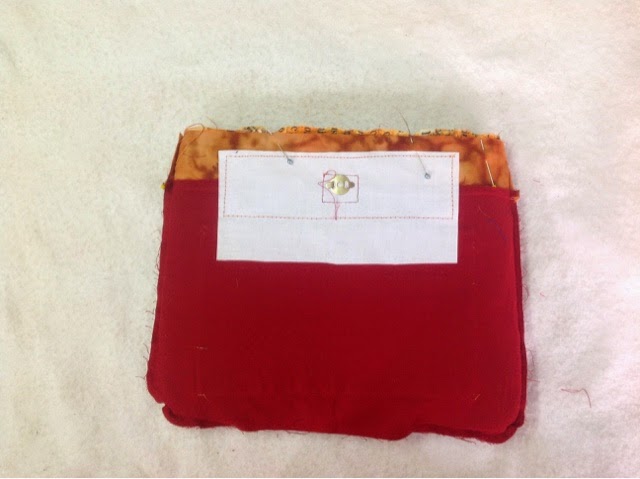


News print material sourced from The material girls on FB.
In a similar way fix the lining in place for the other section .
Finally the bag starts to look real as it takes its shape .
Push the lining inside the bag and Top stitch all around the edge of both the sections .. Close the opening in linings for both sections ... I made a zipper pull from remanants of previous project .
ALL DONE!!!
I did it .a very spacious purse , with lots of pockets ready to travel with me. This is my first pictorial tutorial out of tons of things I have made till date . Hope you all liked it and gain a thing or two from it .
Keep creating !!!
Smita Sinhal.
PS : The flap I had attached was kind of hiding the pleats of pocket in front panel , plus my better half and my son did not like the flap color ..they both help me a lot , giving ideas !!
So removed it ...and added a snap to close the pocket , it took some ripping and stitch ...but I could pull it off ...added black raw silk strip to hide the cutting marks from the hardware I had earlier ...
Here's what it finally looks like
Batik was already in my priced possession of fabrics , I was saving it for a special project.